Getting Access to the Wide Internet in Your Hyper-V Virtual Machine
I’m using Hyper-V on my workstation to run a Ubuntu Linux virtual machine.
I recently moved and changed my office setup. Previously I had a Cat 6 cable into a 2.5G Realtek Ethernet Adapter running into my router, plus a SFP+ DAC cable running into a 10G switch to connect to my local network server.
With the move, though, I wanted to simplify the setup. I’m no longer using a Cat 6 cable and 2.5G NIC to get Internet access. Now I’m only using the small 10 gigabit switch, the Mikrotik CRS305-1G-4S+IN, and that cable supplies my internal and external network needs.
I highly recommend this setup even if it’s just for a local connection. It’s really cool to saturate RAID’ed drive transfer speeds when moving my videos around. If you’re curious, here’s a longer post detailing how I did it all: 10 Gigabit Networking Between Home Server and Computer.
The problem is that removing that 2.5G network cable broke my VM’s internet access.
In this post, I’ll detail what happened and how to fix it.
Losing Internet Access from Hyper-V Virtual Machine
How does Hyper-V manage networks? What are “virtual switches”?
Hyper-V creates a virtual switch to connect your VM to your physical switch.
If you open up Hyper-V and right click on the server (the name of the Hyper-V host, a.k.a. the name of my workstation), you can click on Virtual Switch Manager… to open up some helpful settings.
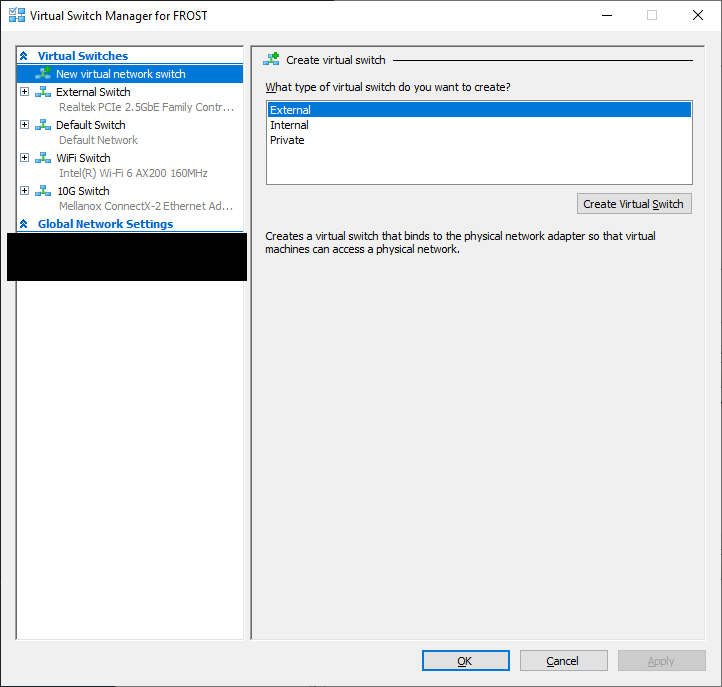
My workstation has four virtual switches:
- The first listed there is the Realtek 2.5G network card I created
- The second listed is the default that Hyper-V created
- The third listed is one tied to my WiFi network card that I created
- The fourth listed is one tied to my 10G network card that I created
There are quite a few settings when making these virtual switches, but they are described well.
How to Create a New Virtual Switch in Hyper-V
When you click on New virtual network switch, the dialog asks what type it should be.
- External switches give you access to the outside network
- Internal switches connect your VMs on the same server and your host OS
- Private switches connect only your VMs on the same server
If you want to get wide internet access, you need a new External switch.
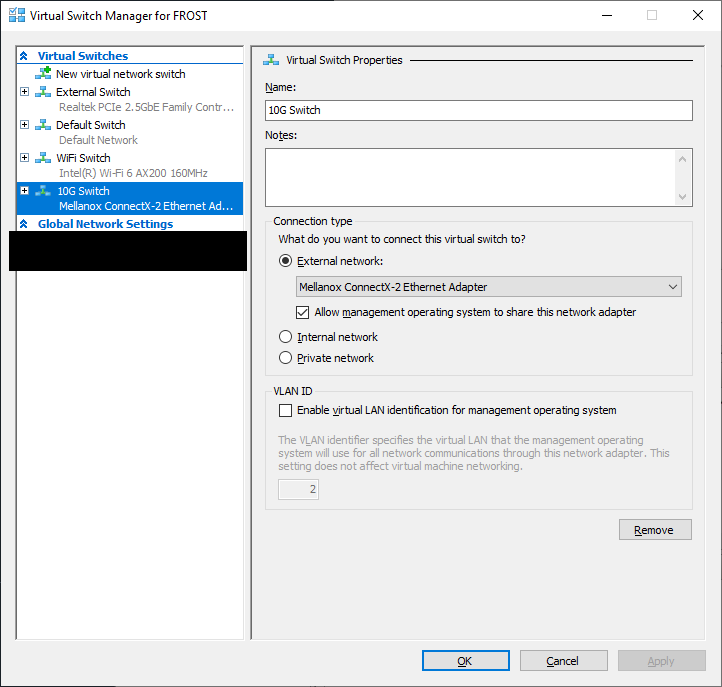
The next screen allows you to pick the “Connection Type”. Since my 10G network adapter is what I want to use, I selected that.
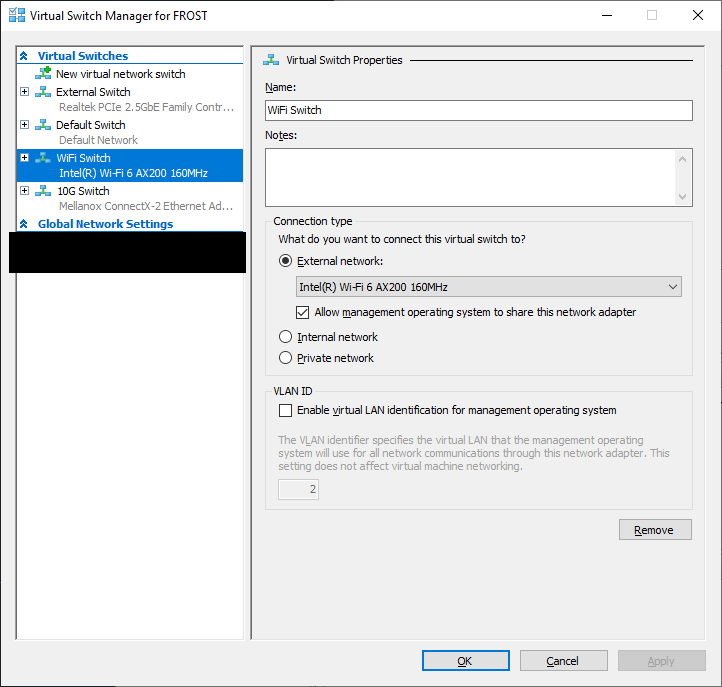
Then, I also created one for my WiFi adapter in case my wired connection is ever down.
Add the New Virtual Switch to the Hyper-V Virtual Machine
Now that I have made the virtual switch, I need to tell the virtual machine that it’s there.
In the Hyper-V manager, right-click on your VM and select Settings….
Now, if you previously had a virtual switch there, it’s likely you still have the network adapter listed there. If you click on it, you can change the virtual switch.
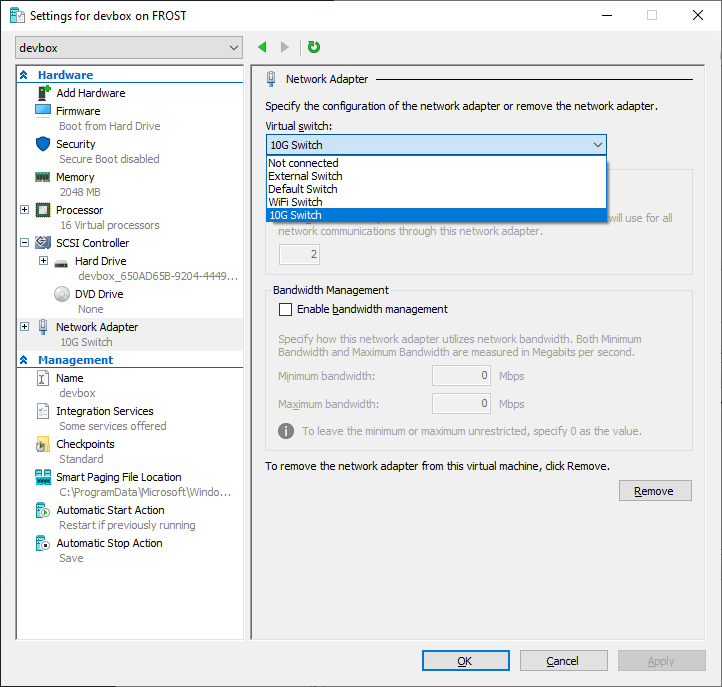
After hitting Apply, you’ll likely need to re-authenticate into your VM. But let’s go in and see if we have access to the network now.

This little network icon in the top right of the screen gives me hope! Let’s open the Network settings now.
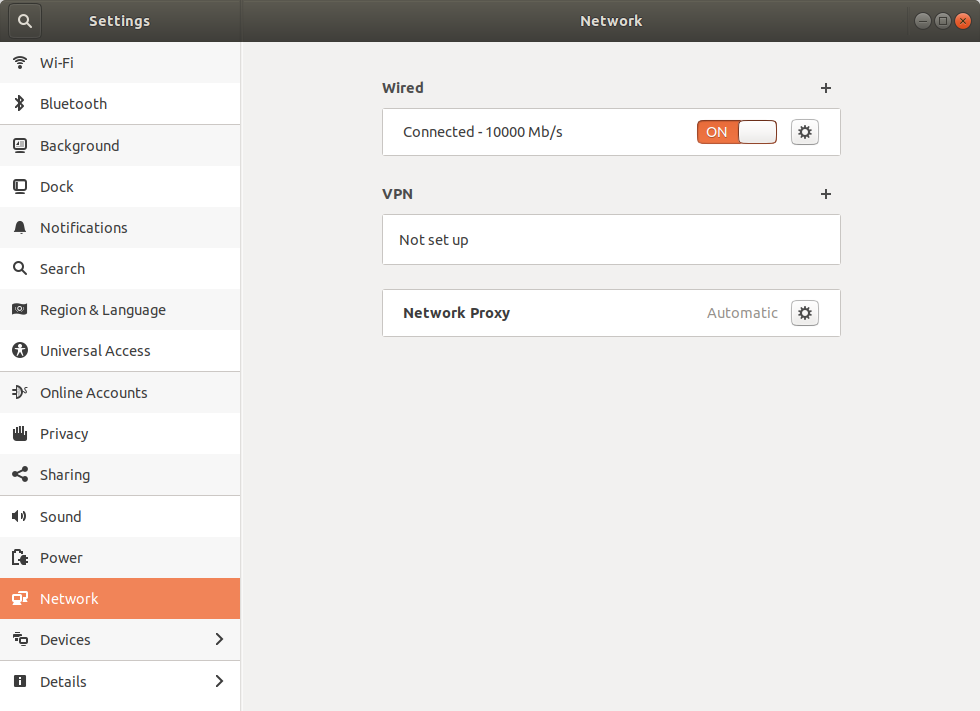
Beautiful! And if we test internet access in the web browser, it works.
Success!
Extra Credit: Adding the WiFi Switch to Our Hyper-V Virtual Machine
As a backup and as further practice, let’s add the new WiFi switch as well.
Back in our virtual machine’s settings, we want to Add Hardware. Select Network Adapter and click Add.
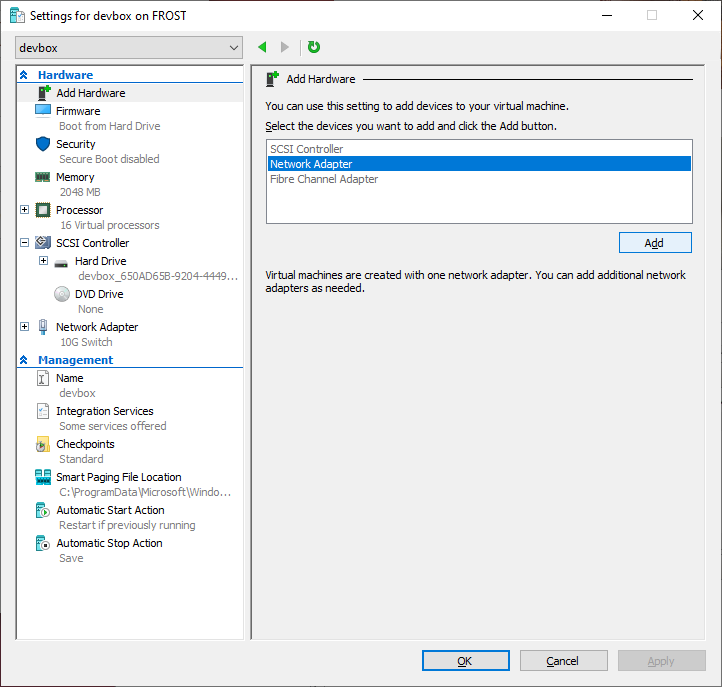
Then select the correct switch and hit Apply.
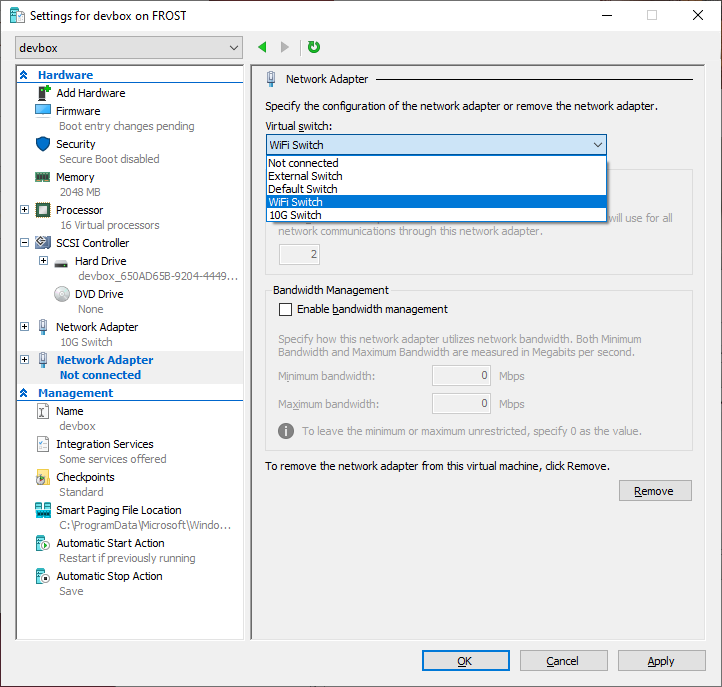
WiFi switch selected
And then let’s check our network settings in ubuntu again.
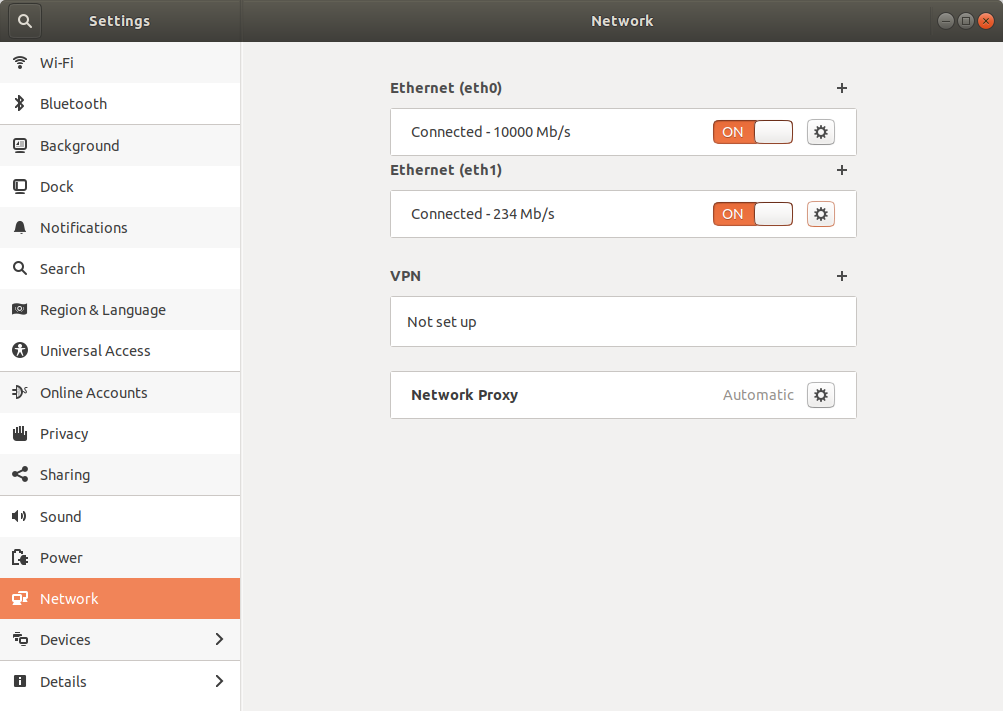
Awesome! If it looks like the network card is there, but you’re getting a “cable unplugged” message, just make sure your WiFi is turned on in your host machine.
Conclusion
That’s it! I’m excited to be up-and-running once again with my virtual machine.
Good luck!