Cloning a Single Production Database Table from Heroku to Local Database with PostgreSQL in Docker Compose
I have a few Django apps in a Django project. I used factory_boy to mock a bunch of the data, but I have a few hundred rows of accurate data in my production database. It made sense to work on a copy of that data as it contains no sensitive user information.
My project is hosted on Heroku with one of their free tier PostgreSQL databases. My local environment is a Docker Compose stack with images for Python, PostgreSQL, and Redis.
The trickiest part here, in my opinion, is finding out just how to get the backup to the PostgreSQL docker container.
Table of Contents
- Table of Contents
- Backup the Production Database
- Clone to Local Database
- Conclusion
Backup the Production Database
There are two easy ways to do this on Heroku
- Use the Heroku CLI
- Use the Heroku web interface
The Heroku docs detail how to make a backup.
Use the Heroku CLI to Backup Database
So first, if you aren’t already using it, you’ll need to install the Heroku CLI and run heroku login.
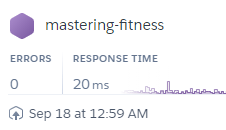
Next, you’ll need to know your app’s name in Heroku. Mine is mastering-fitness, but you can get a list of all your Heroku apps right there in the terminal.
heroku apps
Before we make a backup, let’s get acquainted with the pg:backups command.
heroku pg:backups --help
Read through that briefly as it shows you your options.
To make a backup manually, I will run the following command. You should put your app name in place of mine.
heroku pg:backups:capture --app mastering-fitness
Next, download the file locally.
heroku pg:backups:download --app mastering-fitness
Note that this file will download to your active directory in the terminal. I am working out of VSCode so it went right into my root project folder. But we need to give it to our PostgreSQL Docker container…
Let’s talk about making a backup with the Heroku web interface next. If you’ve made your backup, feel free to skip to Cloning to Local Database.
Use the Heroku Web Interface to Backup Database
Log in at heroku.com.
Find and click on your app.

Find and click on your app
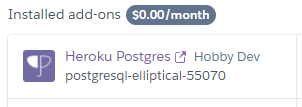
Find and click on your Postgres database.

Find and click on your Postgres database
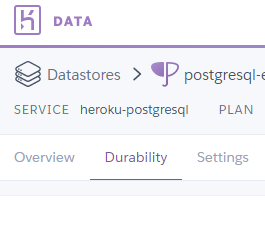
Click on the Durability tab.

Click on the Durability tab
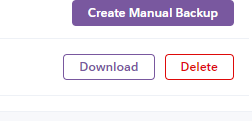
Click on Create a Manual Backup.

Once it’s finished, you should see it right there on the page.
Download the backup and then you’re ready to clone it to your local table.

Cloning to Local Database
I ran into trouble when first trying this because my local database already had some data. I got a bunch of errors when trying to import the production data, but I didn’t want to mess with ALL the data, just a single table in the database.
Destroying Your Old Local Data
If you’re okay with destroying everything, you can use the --clean flag as Matt Segal noted in his article How to pull production data into your local Postgres database.
I have plenty of usable data in most of my apps, but one of them is a list of fitness exercises that I wanted to just nuke and replace. I used the Django admin to remove the five or so testing records I had locally. I am not sure if the --clean flag will delete that single table if you specify a table, so (1) be careful, and (2) if you know the truth, leave a comment below. I’d love to know.
The pg_restore Command
The basic command to import the backup into your local Postgres database is…
pg_restore --dbname DB_NAME --host localhost --port 5432 --username USERNAME --no-owner FILE_TO_IMPORT
But we need to run this in our Postgres Docker container. We might try something like this…
docker-compose exec db pg_restore --dbname postgres --host localhost --port 5432 --username postgres --no-owner latest.dump
…where
- “db” is the name of our Docker Compose service for Postgres
- “postgres” is the name we gave our database AND the user
- “latest.dump” is the file we downloaded from Heroku
But the command won’t be able to find the file because it does not exist there. We need to move it to the Postgres volume where we’re persisting our database’s data.
Help Docker db Service Find Our Postgres Backup File
Here’s the docker-compose.yml file
version: "3.7"

services:
    web:
        build: ./app
        command: python manage.py runserver 0.0.0.0:8000
        volumes:
            - ./app/:/usr/src/app/
        ports:
            - 8000:8000
        env_file:
            - ./.env.dev
        depends_on:
            - db
    db:
        image: postgres:12-alpine
        volumes:
            - postgres_data:/var/lib/postgresql/data/
        environment:
            - POSTGRES_USER=postgres
            - POSTGRES_PASSWORD=secretsecretivegotasecret
            - POSTGRES_DB=postgres
    redis:
        restart: always
        image: redis:6.2.3
        expose:
            - "6379"

volumes:
    postgres_data:
We’ve got a volume called “postgres_data” that maps to the /var/lib/postgresql/data/ directory inside our Postgres container. But where is that on our local filesystem?
Let’s examine our Docker Volumes.
docker volume ls
This will show you the full name of that “postgres_data” volume, prepended with the project name. Mine is “lance-fitness-store_postgres_data”. Let’s inspect that volume.
docker volume inspect lance-fitness-store_postgres_data
In there we see a value for “Mountpoint”. This is what we’ve been looking for! We need to copy our database backup file “local.dump” over to that folder if we want the “db” service to have access to it. To do it in the terminal…
cp latest.dump /var/lib/docker/volumes/lance-fitness-store_postgres_data_dev/_data/latest.dump
Now, we need to point to the file in the volume’s folder in the container. Remember the file location we found in docker-compose.yml?
db:
    image: postgres:12-alpine
    volumes:
        - postgres_data:/var/lib/postgresql/data/
So inside the container my backup will be located at: /var/lib/postgresql/data/latest.dump
Importing Only One Table
We’re almost there!
We just need to add a --table flag to our pg_restore command.
You’ll have to know the name of your Django table. The Django style is appname_modelname, but you can override it if you’d like. I have an Exercise model in an app named exercises. My table is exercises_exercise.
So my final command becomes…
docker-compose exec db pg_restore --dbname store_dev --host localhost --port 5432 --username lance_dev --data-only --table exercises_exercise --no-owner /var/lib/postgresql/data/latest.dump
Conclusion
Hopefully that went without any hiccups! But just in case it did, I tried to outline the goal and thought process of each step here.
Best of luck!
Header database icon: database by Anton Outkine from the Noun Project